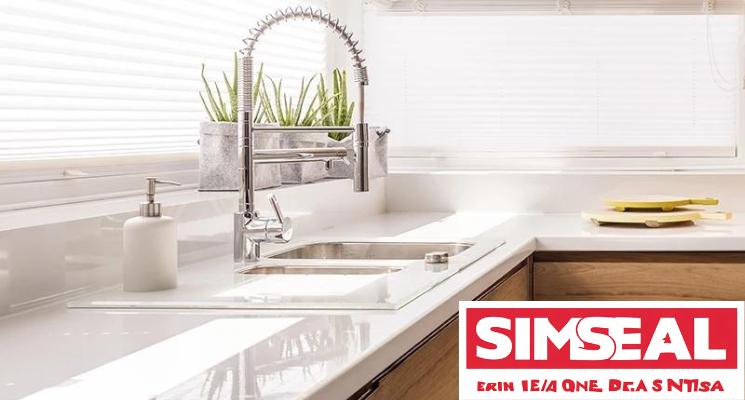
Understanding Why Countertops Leak
Before learning how to seal a leaky countertop with silicone sealant, it is important to understand common leak sources. Leaks typically occur at backsplash junctions, sink rims and edges, corner seams, and gaps between countertop sections. Silicone sealant creates a flexible, waterproof barrier that expands and contracts with temperature changes, making it ideal for sealing a leaky countertop. Unlike rigid fillers, silicone maintains its seal even as your countertop naturally shifts and settles.
Choosing the Right Silicone Sealant for Your Countertop
Selecting the appropriate product is the first step in learning how to seal a leaky countertop with silicone sealant. We recommend SS100 Wet Area for most applications, featuring food safe formulation, mould and mildew resistance, and availability in multiple colors. For specialty applications, consider S50 Roof, Gutter & Glass Sealant for outdoor countertops, S60 Clad and Glaze for stone and composite materials, or Gap Filler for non wet areas.
Essential Tools and Materials for Countertop Sealing
Gather these supplies before starting your project: high quality silicone sealant such as SS100 Wet Area, caulking gun, utility knife, painter’s tape, isopropyl alcohol, lint free cloths, smoothing tool or paddle, disposable gloves, and safety glasses.
Step by Step Guide: How to Seal a Leaky Countertop
Surface Preparation
Proper preparation is crucial for successful sealing. Remove old sealant completely using a utility knife. Clean the area thoroughly with isopropyl alcohol to remove grease, dirt, and moisture. Ensure the surface is completely dry before proceeding.
Application Technique
Cut the nozzle at a 45 degree angle to match your gap size. Apply painter’s tape along both sides of the seam for clean lines. Apply a consistent bead of SS100 Wet Area, maintaining steady pressure on the caulking gun. Work in sections for best results.
Smoothing and Finishing
Lightly mist the fresh sealant with soapy water. Use a smoothing tool to create a concave finish that pushes sealant into the joint. Remove painter’s tape immediately after smoothing.
Curing Process
Allow 24 hours for full curing before exposing to water. Maintain good ventilation during curing time.
Finish Options: Choosing Between Matte and Gloss
For countertop applications, both matte and gloss finishes offer distinct advantages. The matte finish provides a subtle, non reflective appearance that blends seamlessly with most countertop materials and helps conceal imperfections. The gloss finish offers a traditional shiny appearance that complements polished stone and ceramic surfaces. Both options provide identical performance characteristics including waterproofing, flexibility, and mould resistance.
Simseal Products for Bathroom Protection
-
S50 Roof, Gutter & Glass – For shower screens and glass surfaces
-
S60 Clad & Glaze – Ideal for tile joints and wall connections
-
Gap Filler – Suitable for dry area applications
Technical Specifications and Safety Considerations
Always consult the Technical Data Sheet and Safety Data Sheet before beginning your project. Key specifications include 24 hour cure time for a 3mm bead, service temperature range from -50°C to 150°C, movement capability of ±25%, and 12 month shelf life unopened. Safety precautions include working in well ventilated areas, wearing appropriate PPE, avoiding skin contact with uncured sealant, and proper storage away from children and pets.
Maintenance and Long Term Care
After learning how to seal a leaky countertop with silicone sealant, proper maintenance ensures longevity. Clean with pH neutral cleaners only, avoid abrasive scrubbing tools, inspect seals every 6 months, reapply sealant at first signs of wear, and address new leaks promptly to prevent damage.
When to Seek Professional Help
While many countertop sealing projects are DIY friendly, consider professional assistance for extensive water damage repairs, natural stone countertops requiring special care, large scale or complex installations, and recurring leak issues despite proper sealing.
Additional Resources and Support
For more detailed guidance on how to seal a leaky countertop with silicone sealant, explore our related guides on silicone seal maintenance and choosing the right sealant for different surfaces.
Professional Results for Lasting Protection
Mastering how to seal a leaky countertop with silicone sealant protects your investment and prevents costly repairs. Using quality products like SS100 Wet Area and proper techniques ensures a professional finish that stands the test of time.
Need More Help? Talk to the Experts
While this guide covers the basics, every project is unique. For complex jobs or if you’re unsure about the right product for your specific substrate and conditions, it’s always best to get professional advice.
Contact the Simseal Support Team for personalised guidance. Their experts can help you:
-
Select the perfect product for your project.
-
Provide detailed technical information.
-
Troubleshoot application challenges.
You can find all the product specifications, TDS, and SDS documents.
For personalized advice on how to seal a leaky countertop with silicone sealant, visit Sealem Solutions. Our technical team can help you choose the right Simseal products and provide expert guidance for your specific countertop sealing needs.
Recent Comments