How to Seal a Crack in a Door with Silicone Sealant
How to Seal a Crack in a Door? A cracked door can lead to drafts, moisture damage, and even security risks. Fortunately, sealing it with high quality silicone sealant is a simple yet effective solution. In this guide, we’ll walk you through the best techniques for repairing door cracks, ensuring a long lasting, weatherproof seal.
Why Sealing Door Cracks is Important
Cracks in doors can cause several problems, including:
- Energy loss (increased heating/cooling costs)
- Water leaks (leading to rot or mould growth)
- Reduced security (gaps can weaken door integrity)
- Aesthetic damage (cracks make doors look worn)
Using a flexible, waterproof silicone sealant (like those from Simseal) ensures a tight seal that expands and contracts with temperature changes perfect for Australia’s harsh weather conditions.
Step by Step Guide to Sealing Door Cracks
1. Assess the Crack
Before starting, examine the crack’s size, depth, and location.
- Small hairline cracks may only need a thin sealant layer.
- Larger gaps might require backer rod (foam filler) before sealing.
2. Gather Your Tools & Materials
You’ll need:
- Silicone sealant (choose a weather resistant, mould proof type like Simseal’s range)
- Caulking gun
- Utility knife
- Rubbing alcohol & clean cloth
- Painter’s tape (optional, for neat edges)
- Gloves (to keep hands clean)
3. Clean & Prep the Area
- Wipe the crack and surrounding area with rubbing alcohol to remove dirt, grease, and old sealant.
- Let it dry completely before applying new sealant.
- (Optional) Use painter’s tape along the crack edges for a cleaner finish.
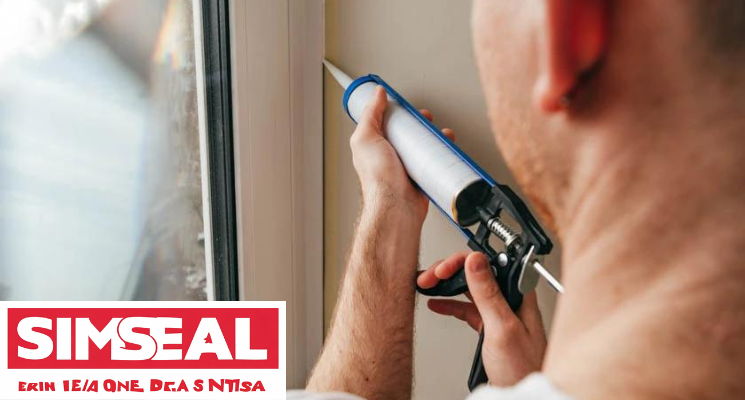
4. Apply the Silicone Sealant
- Cut the sealant nozzle at a 45 degree angle for better control.
- Load the tube into the caulking gun and apply a steady, even bead along the crack.
- For deep cracks, fill in layers, allowing slight drying time between applications.
5. Smooth & Finish the Seal
- Use a gloved finger or caulk smoothing tool to press the sealant into the crack and remove excess.
- Peel off the painter’s tape (if used) before the sealant dries.
6. Let It Cure Properly
- Most silicone sealants take 24–48 hours to fully cure.
- Avoid touching or exposing it to water during this time.
Maintenance Tips for Long Lasting Seals
- Inspect seals yearly for wear and reapply if needed.
- Keep the area clean to prevent dirt from degrading the sealant.
- For exterior doors, check after heavy storms or extreme heat.
Why Choose Simseal Silicone Sealants?
Simseal’s high performance silicone sealants are:
✔ UV resistant – Won’t break down in harsh Australian sun.
✔ Waterproof & flexible – Stays sealed even with door movement.
✔ Mould resistant – Ideal for humid climates.
✔ Trusted by professionals – Used in construction across Australia.
👉 Need the right sealant for your project? Explore Simseal’s range here.
FAQ – Silicone Sealant for Doors
Can I paint over silicone sealant?
Most silicone sealants cannot be painted. If you need a paintable option, consider a hybrid sealant (ask Simseal for recommendations).
How long does silicone sealant last on a door?
A high quality sealant (like Simseal’s) can last 5–10 years, depending on weather exposure.
Should I hire a professional for large cracks?
If the crack is structural (e.g., splits in wooden doors), consult a builder or door specialist before sealing.
Final Thoughts
Sealing door cracks with silicone is a quick, cost effective fix that improves energy efficiency, security, and door lifespan. For the best results, always use a premium silicone sealant like those from Simseal.
🔧 Ready to start your repair? Shop Simseal’s sealants today!
For a guaranteed, perfect finish on critical jobs:
Get a Free Quote from Caulk It’s Experts
Recent Comments