How to Fix a Leak with Silicone Sealant: Fixing leaks effectively is crucial for maintaining your home’s integrity in Australia’s varied climate. From humid coastal regions to dry inland areas, using the right silicone sealant and proper techniques ensures permanent, watertight repairs that withstand local weather challenges. This comprehensive guide will show you how to tackle common household leaks using Simseal’s professional grade products.
How to Fix a Leak? Choosing the Right Silicone for Leak Repairs
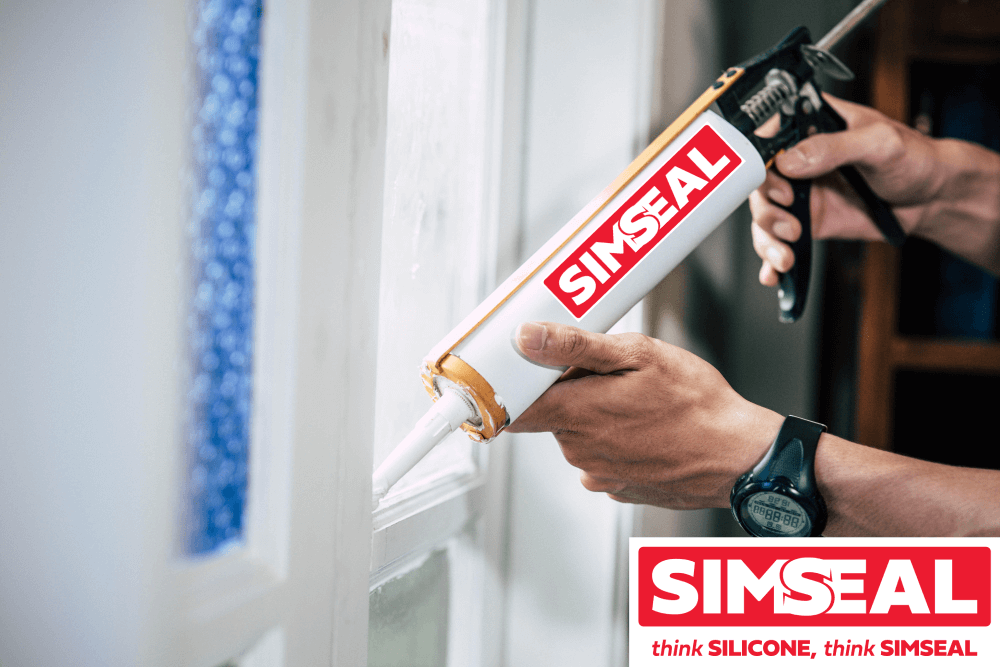
SS100 Wet Area
The SS100 Wet Area is specifically formulated for interior wet areas and offers mould resistance with built in fungicide protection. With ±25% movement capability and a 24-hour cure time for a 3mm bead, it creates a permanent waterproof barrier. According to TDS guidelines, it requires completely dry surfaces, while SDS documentation recommends adequate ventilation during application.
Best for: Interior wet area leaks
Mould Resistance: Built in fungicide protection
Flexibility: ±25% movement capability
Cure Time: 24 hours (3mm bead)
Waterproof: Permanent water barrier
TDS Note: Requires completely dry surfaces
SDS Note: Adequate ventilation needed
S50 Roof, Glass & Gutter
Designed for external leak repairs, the S50 Roof, Glass & Gutter features excellent UV resistance to withstand the Australian sun. Its greater than 400% flexibility and 24-48 hour cure time make it ideal for weatherproof applications. The TDS advises avoiding application during rain, while the SDS emphasizes the need for skin protection during use.
Best for: External leak repairs
UV Resistance: Withstands Australian sun
Elongation: >400% flexibility
Cure Time: 24-48 hours
Weatherproof: Excellent adhesion
TDS Note: Avoid application in rain
SDS Note: Skin protection required
S60 Clad & Glaze
The S60 Clad & Glaze delivers superior bonding strength for structural leak repairs, offering ±50% movement capability and 24-72 hour cure time. Its long term performance makes it suitable for demanding applications. Always check substrate compatibility as noted in the TDS, and wear eye protection as recommended in the SDS.
Best for: Structural leak repairs
High Strength: Superior bonding
Movement: ±50% capability
Cure Time: 24-72 hours
Durability: Long term performance
TDS Note: Check substrate compatibility
SDS Note: Eye protection essential
Essential Tools and Safety Equipment
Gathering the right tools is essential for successful leak repair. You’ll need a quality caulking gun for even application, a sharp utility knife for preparation, and a putty knife for surface work. Don’t forget a stiff brush for cleaning, cloth rags for wiping, and masking tape for clean edges.
Safety should always come first. Wear nitrile gloves as recommended in SDS guidelines and use safety glasses for eye protection. Wear appropriate protective clothing and ensure adequate ventilation in your workspace. Drop sheets will help protect surrounding areas from accidental spills.
Step by Step Leak Repair Process
Identifying and Assessing the Leak
Begin by locating the exact source of the leak, checking for any secondary damage that might need attention. Assess the size of the repair area and determine which Simseal product best suits your specific situation.
Surface Preparation
Proper surface preparation determines the success of your repair. First, stop the water flow completely and ensure the area is thoroughly dry. Remove all old sealant and debris, then clean with isopropyl alcohol to achieve a bone dry surface ready for application.
Application Technique
Apply the sealant with even, consistent pressure while maintaining a 45-degree angle. Fill the cavity completely and overlap existing sealant edges to ensure complete coverage. Avoid stretching the material during application for best results.
Curing and Testing
Allow the full cure time as specified in the TDS documentation, maintaining stable conditions throughout. Avoid any water exposure during the curing process, and only test the repair after full curing is complete. Monitor the repair for several days to ensure success.
Common Leak Scenarios and Solutions
Bathroom and Wet Area Leaks
Common bathroom leaks include shower base leaks, vanity top seepage, tile grout failures, and plumbing penetrations. These typically require the mould resistant properties of SS100 silicone.
External and Roof Leaks
For external issues like flashings and vents, gutter joints, window perimeters, and cladding joints, the UV resistant S50 formulation provides optimal protection against Australian weather conditions.
Plumbing System Leaks
Pipe penetrations, valve connections, overflow pipes, and drain connections often need the strong bonding capabilities of S60 sealant, especially when dealing with structural movement.
Technical Considerations from TDS
Always consult the Technical Data Sheets for specific substrate guidelines and application conditions. Most silicone sealants require application between 5°C to 35°C on completely dry surfaces with relative humidity below 80%. Avoid direct sunlight during application for best results.
Safety precautions from SDS documentation include wearing nitrile gloves and safety glasses while ensuring good ventilation. Store products below 25°C in sealed containers and dispose of waste properly. In case of eye contact, flush with water immediately, and for skin contact, wash thoroughly with soap.
Maintenance and Prevention Strategies
Regular inspection every three months helps identify early signs of failure before they become major issues. Monitor high risk areas and address minor problems promptly to prevent larger repairs. Clean seals regularly with mild detergents and avoid harsh chemicals that might damage the silicone.
Keep records of all repairs and maintenance activities. For complex issues involving structural water damage, major roof leaks, or plumbing system problems, consider consulting professional technicians. Similarly, seek expert help when dealing with electrical hazards, height access issues, or asbestos containing materials.
Common Repair Mistakes to Avoid
Preparation Errors:
-
Applying to wet surfaces
-
Incomplete cleaning
-
Ignoring substrate issues
-
Rushing preparation
Application Mistakes:
-
Wrong product selection
-
Insufficient sealant application
-
Poor tooling technique
-
Inadequate coverage
Curing Problems:
-
Testing too early
-
Water exposure during cure
-
Extreme temperature changes
-
Physical disturbance
Achieving Professional Results
Successful leak repair with silicone sealant requires the right products, proper technique, and attention to detail. By choosing appropriate Simseal products, following TDS guidelines, and observing safety precautions, Australian homeowners can achieve permanent, watertight repairs that withstand local conditions.
Remember that thorough preparation, correct product selection, and allowing adequate curing time are all essential for successful repairs. Always consult product documentation for specific requirements and recommendations for your particular situation.
For guaranteed results on critical jobs, consider consulting Caulk It’s experts who can provide professional application services and advice tailored to your specific needs.
Successful Leak Repairs
How to Fix a Leak? Fixing leaks with silicone sealant requires the right products, proper technique, and attention to detail. By choosing appropriate Simseal products, following TDS guidelines, and observing safety precautions, Australian homeowners can achieve permanent, watertight repairs that withstand local conditions.
Remember that successful leak repair depends on thorough preparation, correct product selection, and allowing adequate curing time. Always consult product documentation for specific requirements and recommendations.
Need assistance? Contact our technical team for product advice and application support.
Explore Our Products:
Download technical documentation including TDS and SDS sheets for all Simseal products to ensure proper application and safety compliance.
For a guaranteed, perfect finish on critical jobs:
Get a Free Quote from Caulk It’s Experts
Recent Comments